Author Archive
Tips: Steam Pressing
Posted on: June 12, 2010
- In: Sewing Tips
- 1 Comment
Pressing is not just a suggestion, it is a necessity. As I have said before, I keep my ironing board up when I am sewing because I always press fabric before cutting (if it is not smooth) and I press seams open or press hems into place, etc.
I have a steam iron and I use DISTILLED water. The manufacturer says that tap water will work, but I have my doubts. Tap water contains minerals that can eventually build up deposits inside your steam or spray mechanism. I just use distilled water in mine because it is very inexpensive and one gallon goes a long way.
One thing that really BUGS me though is filling the iron with water. Even when I am extremely careful and try to pour slowly, I can still spill water onto the board. I finally found a very easy solution that works every time. I went to the dollar store and purchased a plastic squeeze bottle and I fill it with water first. Such a simple thing, but I just love how it makes my ironing just a little easier!
On the subject of ironing… who remembers THIS contraption?
When I was little, my mother used one of these to sprinkle water on items to be ironed. She would roll the dampened items up and then iron them one by one. This was before “steam” irons or even water spray bottles. There was canned STARCH of course and she used that too. Boy, don’t you just love fabric blends??? 🙂
to Delanna
Posted on: October 15, 2009
My snuggie pattern is now available in Adult and Child sizing. For kids, you can generally use 1.5 yards, but if your child is taller than 48″, use his/her height as your yardage requirement. As a general rule, you may need 2 yards for kids 10 or older.
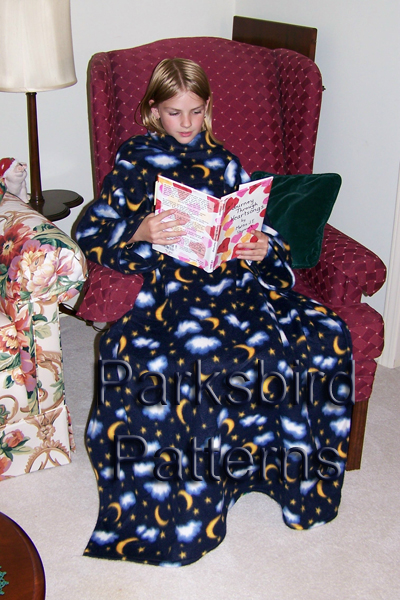
my granddaughter in her snuggie! She loves it!
Click the link below to purchase the pattern with adult and child sizing for $7.88 (digital download)
Notions: Bobbin Minder(s)
Posted on: September 19, 2009
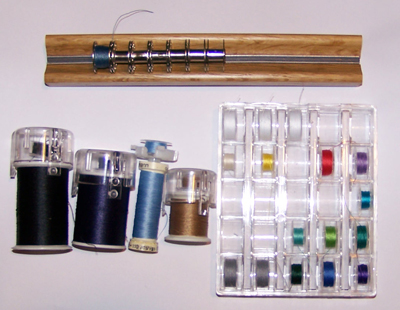
I have used several types of bobbin “minders” or trays. If you don’t have hundreds of spools of thread, you might go with the “cap” style. I use the plastic tray the most.
I apologize for my absence
Posted on: August 31, 2009
I’ve been under the weather (so to speak) since mid July. I’m much better now, but turns out that I did not injure my back as I originally thought. I have been diagnosed with arthritis and bone spurs in my spine. For a while there when it flared up, it was pretty painful to sit anywhere in a straight chair (such as I would use to sew or use the computer). I had to reserve my straight-chair sitting for essential tasks. Hopefully, now that I’m feeling better, I’ll be able to do some more posting about sewing machines and sewing tips.
Diane
Tips: How to use a Ruffler Foot
Posted on: July 19, 2009
- In: Notions | Sewing Tips
- 5 Comments
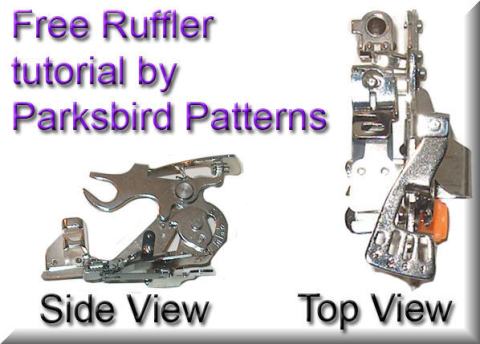
Note: A ruffler foot is not required for any of my Parksbird Patterns.
| A ruffler foot can be VERY intimidating. I know mine was when I received it (with NO instructions!) It is a lot of FUN to use and makes ruffles a breeze.First, you may need a shank adapter to fit your machine unless your presserfoot attaches by “wrapping” the curved piece around a permanent shank and screwing it on. |
 |
| There may be an adjustable gauge for gather regulation.the number (x) means ruffle every x stitches 1 would be VERY full because it will ruffle with For standard ruffles, I keep mine set on 6. There should also be a slot that enables you to stitch If you are stitching normally, you may |
 |
| The big “U” will loop around the needle’s thumbscrew. It will cause the mechanism to bob up and down with the needle – so it knows how many stitches it has made.Warning – this is not particularly easy to do – you’ll have to twist the foot around to get both parts attached. The shank attaches normally. If you do not have a |
 |
| Once you have the ruffler foot attached to your machine (I don’t have it attached in this photo), you will put RIGHT SIDES TOGETHER same as you normally sew.Your main fabric goes on the bottom (right side of fabric is up) Your ruffle fabric feeds through the slot above the presserfoot (right side of fabric is down) The foot will “grab” a section of your ruffle fabric Just take care to keep the raw edges of your main I recommend doing some “test” |
 |
| You can make further adjustments to the ruffle fullness by adjusting your machine stitch length.Shorter stitches = fuller ruffles TIP: Hem your ruffle before you
|
 |
| Fabric requirements for your ruffle:Using setting 1, you will need 4 or 5 times as much ruffle length as main fabric length. Using setting 6, you will need at least twice as much Using setting 12, you will need about 1.25 times as |
 |
Notions: Pin Grabber
Posted on: July 17, 2009

This is a very handy little tool if you ever spill or drop pins. On one end, it is a magnetic wand and you just run it across the carpet or desk to grab any loose pins.
Tip: Sharpening Scissors
Posted on: July 16, 2009
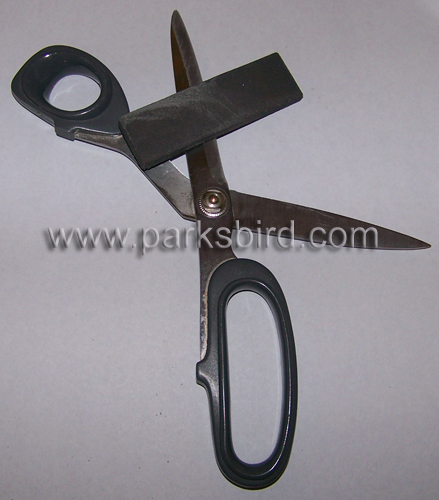
When I was taking Home Economics at UNC-Greensboro in the 1970’s, we got a good deal on scissors made by Gingher (rhymes with”singer”). I paid $7.00 for a pair of “top of the line” scissors. In 1973, that was a lot for a student and a lot for scissors, but I still have those scissors (not the ones shown in the photo). A small sharpening stone came with each pair of scissors purchased and we were shown that you ONLY sharpen the top cutting edge on scissors. This edge is the one that looks like a knife. You only sharpen the side that is beveled (as shown in the photo). You do not need to sharpen the bottom blade of the scissors. Move the sharpening stone in ONE direction only – from the top toward the bottom edge of the blade. Do not file back and forth like fingernails; this could damage the blade.
Notions: Thread Cutter
Posted on: July 15, 2009
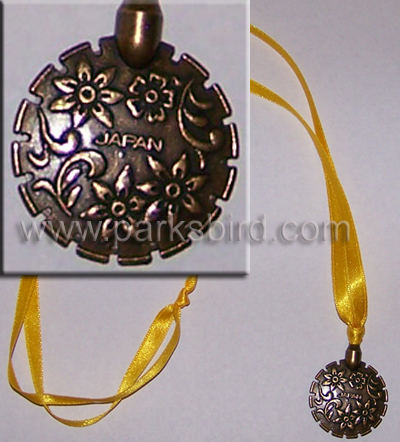
I purchased this thread cutter at Clotilde.com and added my own ribbon to wear it around my neck. It makes it easy to trim threads when hand or machine sewing. The notches around the edge are cutters. It is safe to wear though – it won’t cut anything accidentally.
Notions: Bobbin Winder
Posted on: July 14, 2009
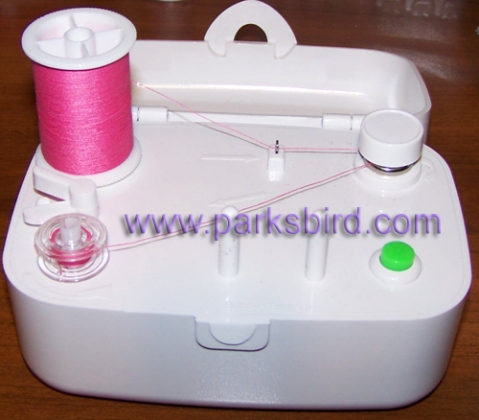
If you do a lot of embroidery, you will love this gadget. I always thread several white or black when I wind bobbins. For other colors and general sewing, I just fill bobbins as I need them. This item is a little pricey in my opinion, but if you find one on sale, it is worth it – or if someone needs a gift idea for you. 🙂
Notions: Needle Tool
Posted on: July 13, 2009

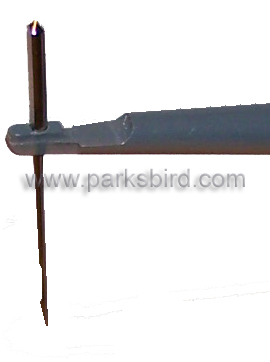
If you have a serger, your machine may have come with this tool. It has a brush on one end for machine dusting and a hole on the other end to use for needle insertion.
Replacing serger needles can be awkward and difficult, but this tool makes it easy.
Simply insert the needle as shown and be sure the FLAT side of the needle faces AWAY from you (toward the back of the serger). You can insert the needle and hold it firmly in place as you tighten the screw that holds the needle in the machine.
This tool is also good for regular sewing machines – not only sergers.


